

Until recently, sub-ohm vaping was a somewhat obscure topic, largely relegated to experts within the vaping community and those who had taken up “competition vaping.” Most e-smokers were happy to leave sub-ohm vaping to others and content themselves with replacing cartomizers or filling tanks each day. However, the playing field has begun to change.
Today, you can buy sub-ohm tanks with coils already wired for the resistance of your choice, and rebuildable atomizers cost less than half of what they once did. To try sub-ohm vaping, you no longer need to go out of your way to buy wires from an electronics store and wicks from a craft store — companies such as VaporFi, Halo and Volcano have reinvented themselves as one-stop shops for all things sub-ohm, making it easier than ever to get started.
Sub-Ohm Vaping Ultimate Guide: Table of Contents
Click an item to navigate directly to that chapter.
- What Is Sub-Ohm Vaping?
- Is Sub-Ohm Vaping Dangerous?
- What Do I Need for Sub-Ohm Vaping?
- Attachments for Sub-Ohm Vaping
- Types of Wires for Sub-Ohm Vaping
- Types of Wicks for Sub-Ohm Vaping
- Building Your First Coil
What Is Sub-Ohm Vaping?
The resistance of a heating coil — defined in ohms — expresses the amount of current that the coil restricts. If the voltage of the battery is the same, lowering the resistance of the coil increases the amount of wattage generated, making the coil hotter and allowing it to generate more vapor. For comparison’s sake, we consider a coil with a resistance of about 2.5 ohms to be “standard,” while a coil with a resistance of 3.0 ohms and higher is “high-resistance.” A coil of about 1.5 ohms is “low-resistance,” and anything under 1.0 ohms is “sub-ohm.”
In simple terms, sub-ohm vaping allows an e-cigarette to generate a higher wattage without increasing the voltage of the battery. Using Ohm’s Law as a guide, we find that pairing a 3.7 volt battery with a 2.5 ohm coil results in 5.48 watts of power. Lower the resistance to 1.5 ohms, and the power increases to 9.13 watts. The further you lower the resistance of the coil, though, the more dramatic things become. With a 0.5 ohm coil and a 3.7 volt battery, an e-cigarette generates 27.38 watts of power — roughly triple the vapor production. So, if you have ever wished that your e-cigarette could generate more vapor than it does, sub-ohm vaping is the fastest way to accomplish that.
Is Sub-Ohm Vaping Dangerous?
For an extremely detailed and informative overview on the safety of sub-ohm vaping, we recommend reading this post on the e-cigarette forum. The consensus among experts seems to be that sub-ohm vaping is not categorically dangerous, but it does pose certain risks that are less likely to be factors with standard e-cigarettes.

Volcano Pele mechanical mod with Caldera rebuildable atomizer.
Higher Amounts of Flavoring Chemicals
People who switch to sub-ohm coils immediately begin to consume significantly more e-liquid with each puff. Eventually, this often causes people to lower the nicotine strength of their e-liquid but consume drastically more of it. This means that if the e-liquid you enjoy contains flavoring elements that are dangerous when inhaled — something that we don’t know about most flavoring agents — you’ll be inhaling even more of those flavors.
Therefore, with sub-ohm vaping, it is extremely important that you buy your e-liquids from vendors willing to provide detailed lab analysis reports.

Metal Particles and Chemical Reactions
Some studies suggest that hazardous substances can be created during vaping, such as very fine particles of metal or carcinogenic compounds generated either by high heat or a reaction between the e-liquid and the metal of the heating coil. Because there are so many possible combinations of coil type, heating temperature, wick material and e-liquid composition, it isn’t yet known exactly which combinations might be more dangerous than others. It is safe to say that if your preferred vaping setup results in the inhalation of any dangerous compounds, you’ll inhale more of those compounds with sub-ohm vaping.
Battery Safety Concerns
There are quite a few types of batteries used in mods today, manufactured by a variety of companies including Sony, Sanyo, Panasonic, Samsung and LG. Assuming that these batteries have no faults and and aren’t counterfeit, virtually all of them should be entirely safe for use with standard-resistance atomizer coils. However, problems can start to creep in when you use some cells for sub-ohm vaping. Some configurations cause the amperage requirements placed upon the battery exceed its safe discharge rate. Some batteries have safe discharge rates under 7 amps, while others are safe at 30 amps and higher. Supposing that you run your sub-ohm coils at an average power level of 40 watts, let’s examine what the amperage requirements would be with sub-ohm coils at different resistance levels:
- 0.9 ohms: 6.67 amps
- 0.8 ohms: 7.07 amps
- 0.7 ohms: 7.56 amps
- 0.6 ohms: 8.16 amps
- 0.5 ohms: 8.94 amps
- 0.4 ohms: 10 amps
- 0.3 ohms: 11.55 amps
- 0.2 ohms: 14.14 amps
- 0.1 ohms: 20 amps
- 0.05 ohms: 28.28 amps
A resistance of just 0.8 ohms is sufficient to exceed the operating limits of a battery that only supports a 7 amp continuous load. A resistance of 0.1 ohms is unsafe with all but the best batteries. In addition, you can see that the demands placed upon a battery begin to increase exponentially as the resistance of the coil approaches zero. As such, when you enter into the world of sub-ohm vaping, it is extremely important that you understand the capabilities and limitations of your device’s battery.
To maximize the safety of your sub-ohm vaping setup, we recommend selecting a battery with the highest possible safe discharge limit and using the highest possible coil resistance that still satisfies your needs for vapor production. Use a mod with plenty of vents. If your device becomes anything more than slightly warm during use, you are probably over-stressing the battery and need to change something about what you’re doing.
Sub-Ohm Battery Safety Warning:

40 amps? Are you sure?
Unless you buy a battery with the logo of one of the manufacturers listed above, you’re most likely buying a “re-wrap.” Setting up a factory to build battery cells is extremely expensive. It costs far less to buy batteries from a third party manufacturer, cut the wrapper off put the battery into a new wrapper with a fancy logo. Ideally, the companies that re-wrap batteries for sale perform their own independent testing of the cells and possibly even add upgraded circuit boards with superior safety features.
The reality, though, is that some re-wrapped cells don’t live up to the specifications on the labels. It seems that the government doesn’t have regulations in place to prevent companies from selling batteries with exaggerated specifications. The companies that exaggerate the specifications of their batteries get away with it for the most part for two reasons. First, many of them are in China, where serving a lawsuit from the United States is difficult. Second, e-cigarette explosions are rare — even with batteries that are counterfeit or have exaggerated specifications.
Why? Let’s suppose that you have a battery with a label that says the battery supports a continuous discharge of 30 amps. The cell inside the wrapper, though, only supports a 10 amp continuous discharge. If you vape at 40 watts, you’ll need an atomizer resistance below 0.4 ohms to really have any risk of a problem.
In addition to batteries with exaggerated specifications, counterfeit 18650 batteries are rampant because of demand from the vaping industry. When you buy batteries for sub-ohm vaping, buy from a vendor you trust.
What Do I Need for Sub-Ohm Vaping?
Sub-Ohm Mod
In vaping, the term “mod” refers to any e-cigarette that doesn’t look like a real cigarette. In this article, we use the terms “mod” and “e-cigarette” interchangeably because no cigarette-shaped e-cigarette or “cigalike” will work for sub-ohm vaping. So, the first thing that you need for sub-ohm vaping is a mod that supports sub-ohm coils. At minimum, we suggest buying an e-cigarette that supports 0.5 ohm coils — although many mods can go well lower than that. The mod should also have a variable-wattage function that allows you to adjust the power the e-cigarette supplies to the atomizer coil.
Temperature Control Mods
Should you buy a temperature control mod? We do suggest buying a mod with temperature control features if possible. Having a temperature control mod allows you to use virtually any tank — or any coil building material — on the market.
The more important reason to own a temperature control mod, though, is that temperature control helps to prevent burned cotton and “dry hits.” If your wick isn’t drawing e-liquid to the coil efficiently — or you forget to fill your tank — your coil could overheat very quickly and burn the wick. A temperature control mod detects the overheating coil and immediately reduces power to avoid burning the wick.
Mechanical Mods
Should you buy a mechanical mod? A lot of e-cigarette users love mechanical mods. They’re very small, stylish, inexpensive and durable. Since a mechanical mod is essentially just a tube and a button, it can theoretically last almost forever. A mechanical mod uses no electricity to power a microprocessor and other components, so all of its power goes directly to the atomizer coil. If everything else is equal, a mechanical mod may cause a coil to heat faster and generate more vapor.
So what’s wrong with mechanical mods? The fact is that all of those microprocessors and fuses in a regulated mod aren’t there for show — they help to keep you safe. Our research suggests that among e-cigarettes that have exploded during use, all of them were mechanical mods. We believe it’s better to spend a little extra money on a mod that won’t attempt to fire the atomizer under unsafe conditions. As a result, we don’t recommend buying a mechanical mod.
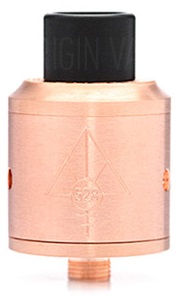
Sub-Ohm Attachment
The attachment is the part of your e-cigarette that generates vapor. It might be a rebuildable atomizer or a tank system, for example. Some people refer to e-cigarette attachments as “toppers.” We’ll discuss all of your options for e-cigarette attachments later. For now, know that in order for a sub-ohm attachment to work for sub-ohm vaping, it must have a coil resistance of under 1.0 ohms.
Batteries and Charger

You can buy a sub-ohm mod with a fixed battery or removable batteries. A fixed battery is very convenient, since it’s included with the mod. Mods with fixed batteries are sometimes a little smaller — and often cost less — than those with removable batteries. A fixed battery also makes USB charging a possibility, although many removable battery mods have USB ports as well. On the other hand, most companies won’t repair a fixed battery mod that no longer holds a charge unless it fails during the warranty period.
If a mod has a removable battery, then replacing a battery that no longer holds a charge is as simple as buying a new battery. Also, having a mod with a removable battery gives you the ability to select batteries and a charger based on their specifications rather than settling for what the manufacturer gives you. You might pay more, but you may also get better batteries and a more reliable charger.
Coil Building Supplies

Do you want to buy a rebuildable atomizer and start building your own coils? Although the long-term cost of building atomizers is very low, you’ll need some supplies to get started. At the minimum, you’ll need a resistance tester, some wire and some wick material. We suggest getting a coil building kit, though, rather than buying components individually.
Attachments for Sub-Ohm Vaping
In sub-ohm vaping — or any other type of vaping, for that matter — the attachment is the device that actually produces the vapor. You attach it to your e-cigarette, and it holds and vaporizes your e-liquid. Sub-ohm vaping attachments fall into three different categories: rebuildable atomizers, rebuildable tank atomizers and sub-ohm tanks. Because people drip e-liquid into rebuildable atomizers before puffing, most people in the vaping community call them rebuildable dripping atomizers or RDAs.
We’ll describe the benefits and drawbacks of these three sub-ohm vaping attachments in greater detail in the three sections below. For now, though, here is a summary:
- Rebuildable dripping atomizers (RDAs): Produce the most vapor possible and cost the least to operate. However, they require constant attention.
- Sub-ohm tanks: Produce less vapor than RDAs and cost more to operate. However, they require little attention and are extremely convenient.
- Rebuildable tank atomizers: Attempt to strike a balance between RDAs and tank systems.
Sub-Ohm Tank System
The Best Sub-Ohm Tanks:
- Good for Beginners
- VaporFi Volt Hybrid Tank ($49.99)
- Excellent sub-ohm tank with few quirks. Based on the popular Kanger Subtank Mini — and accepts Subtank Mini coils — but has two VaporFi-exclusive improvements: wider wick holes on the rebuildable deck and better insulators. You can buy the SubTank Mini for less and have a very simlar experience, but you won’t get VaporFi’s customizations. Use it as a sub-ohm tank with drop-in coils, or install the rebuildable deck and build your own coils.
- Horizon Arctic Tank ($19.95)
- Excellent tank for beginners. Few quirks, nicely machined, coils available almost everywhere. Doesn’t require ultra high wattage to achieve very good vapor production. Resists leaking. Note that you can receive this tank as part of a bundle with a 2,300 mAh e-cigarette, two coil heads, two mouthpieces, a wall charger and a USB charger by purchasing the Halo Tracer e-cigarette for $50.00. Use the coupon code VAPE4LESS to save an additional 5 percent.
- VaporFi Volt Hybrid Tank ($49.99)
- Good for Experts
- SMOK TFV8 Cloud Beast ($29.99)
- Not for beginners. Has a wide assortment of drop-in coils available. One coil has 8 (!) individual heating wires and works at up to 180 watts. Another coil includes a Clapton wire twisted around 8 (!) core wires. Perhaps the most possible vapor production currently available with a sub-ohm tank, but requires a device with a very reliable battery. Has a rebuildable deck, so you can build your own coils. Replacement coils are a bit expensive.
- Horizon Krixus Tank ($34.95)
- Not for beginners. Very unique design uses a sintered ceramic coil with an embedded tungsten heating element. Usable in wattage mode or in temperature control mode on a device with upgradeable firmware or the ability to adjust temperature coefficient manually. Easy coil cleaning — simply remove the cotton and dry fire the coil until the ceramic glows. Replace the cotton and continue vaping. Horizon claims that one coil lasts up to six months.
- SMOK TFV8 Cloud Beast ($29.99)
How Sub-Ohm Tanks Work
 A sub-ohm tank gives you vastly improved vapor production compared to the attachments that an e-cigarette for beginners typically uses — without sacrificing convenience. To fill it, you simply unscrew the top or bottom and add e-liquid directly to the tank. Eventually, the tank’s flavor quality will decrease. To fix that, unscrew the coil and screw in a new one. A sub-ohm tank is the easiest possible way to get more vapor out of your e-cigarette — as long as you have a battery or device that supports sub-ohm vaping. If you already own the e-cigarette that you want to use and aren’t sure if can handle a sub-ohm coil, ask the seller for help.
Many sub-ohm tanks have multiple coils available because no single configuration suits every e-cigarette user. Coils may come in different resistance levels and with different types of heating coils or different coil layouts. Some of the coil types that may be available for a sub-ohm tank include:
- Single-coil
- Multiple coils, from dual-coil ranging up to octuplet coil
- Twisted coil designs, such as Clapton coils
- Alternative wick materials, such as ceramic fiber
- Alternative coil materials, such as nickel, titanium or stainless steel
In general, unless you’re certain that your e-cigarette supports temperature control mode, you’ll want to buy Kanthal coils. If the coil material isn’t stated on the package, you can assume it’s Kanthal. If you don’t know the maximum supported amperage of your device, try starting with a coil resistance of 0.5 ohms after confirming that your device supports sub-ohm vaping. Virtually every device that supports sub-ohm coils at all will have no trouble with a 0.5 ohm coil.
 Pros of Sub-Ohm Tanks
Sub-ohm tanks are extremely convenient to use. Although an e-cigarette with a sub-ohm tank probably shouldn’t be the first e-cigarette that you buy, it could be. It takes minutes for anyone to learn how to fill a tank and replace a machine-made coil. Since the manufacturers test the coils before they ship out, there’s virtually no chance of danger unless you use a sub-ohm tank with a device that doesn’t support sub-ohm vaping. If you’re not currently using an e-cigarette with a sub-ohm attachment, upgrading to a sub-ohm tank will vastly improve your vapor production with almost no fuss.
Cons of Sub-Ohm Tanks
If a sub-ohm tank is simple enough for a beginner to use, it’s not going to produce as much vapor as a rebuildable atomizer. If your first e-cigarette is a 1 and a properly configured rebuildable atomizer is a 10, a sub-ohm tank might be a 7. It’s a great improvement, but it isn’t the absolute best experience possible. Still for a great many e-cigarette users, a sub-ohm tank is good enough because you get almost all of the vapor of a rebuildable atomizer with almost none of the convenience issues and safety concerns.
The long-term cost of ownership is an additional downside of sub-ohm tanks. Although building a coil for a rebuildable atomizer requires just a few cents of materials, a typical coil for a sub-ohm tank costs around $2.00. If you’re the type who burns your wicks easily, you’ll need to replace your coil every few days to keep the flavor quality high. If you don’t burn your wick, though, you can expect a sub-ohm tank coil to last quite a while. Still, the cost of consumable materials is definitley higher with a sub-ohm tank system than with a rebuildable atomizer.
How to Buy a Sub-Ohm Tank

Before you buy any sub-ohm tank, examine the quality of the threading. A sub-ohm tank has at least one threaded joint to allow you to replace coils and refill the tank. You’ll most likely open your tank several times each day for refilling, so the threads need to be easy to turn and able to withstand repeated use.
The most common complaint about sub-ohm tanks is that they leak. Look for a tank that includes plenty of o-rings to keep the e-liquid where it’s supposed to be. Today, you can find sub-ohm tanks with a lot of extra gimmicks such as extra top-mounted airflow collars and ports for top filling. Every time you add an additional hole to a tank, though, you’re creating an additional avenue for potential leaking. If you don’t want e-liquid seeping from your tank — and you want a tank with extra air or e-liquid holes — make sure that the manufacturer has addressed potential leaking.
Rebuildable Dripping Atomizer (RDA)
The Best RDAs:
- VaporFi Venom ($44.99)
- Velocity build deck. Very deep drip well. Color-changing enclosure activates with heat.
- Volcano Caldera ($59.99)
- Three-post RDA. Vortex design at the top reduces waste from condensation. Made in Hawaii.
- Volcano Cauldron ($19.99)
- Three-post RDA with interchangeable colored sleeves. Excellent budget RDA.
- Wotofo Lush ($29.99)
- Angled airflow creates a cyclone for superior cooling. Silver plated center pin for better conductivity.
- Digiflavor Pharaoh ($39.95)
- Uses clamps instead of posts to make building easier. Drip tip minimizes coil spitting.
- Mutation X V5 ($26.95)
- Extra airflow keeps vapor cool. Accommodates both single-coil and dual-coil designs.
- Wismec Neutron ($27.95)
- Interchangeable posts allow for many different coil layouts. Stylish design.
- 528 Custom Goon ($55.95)
- Uses clamps instead of posts to make building easier. Very deep drip well minimizes leaking.
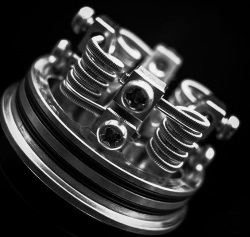
 An RDA is the attachment that you want to use for sub-ohm vaping if superior vapor production is the primary thing that you want from your vaping experience. When you open an RDA, you’ll see some posts with holes and screws — and not much else. It’ll be up to you to provide the wire, wrap a working coil, add a wick to the coil and attach it to the posts. In other words, an RDA gives you electrical connectivity to your e-cigarette. You’ll need to do the rest — including making sure that your coils are actually safe to use.
Building an atomizer coil for the first time is a bit of an intimidating experience. At the end of this article, you’ll find text instructions and a link to a photo series that’ll make things simpler for you. RDAs really aren’t for beginners, though. If you’re new to e-cigarettes and someone at a vape shop attempts to sell you an RDA — especially one that comes with a mechanical mod — you should run far, far away.
How Rebuildable Atomizers Work
 A rebuildable atomizer has a positive post and a negative post — and sometimes more than one of each. Most current RDAs are designed to accept two coils. So, to set up an RDA, you’ll take two resistance wires and twist them around a drill bit or coil jig to make two coils. You’ll attach the leads of those coils to the posts of the RDA and insert a wick into each coil. You’ll check the resistance of your atomizer to confirm that your e-cigarette supports it, and then you’ll trim the coil leads, close the RBA and attach it to your e-cigarette.
You’ll add e-liquid to the RDA by dripping e-liquid into the mouthpiece from a bottle or dropper. An RDA usually has a well below each atomizer coil, allowing the RDA to hold enough e-liquid for a few puffs at a time. The wicks draw e-liquid from the wells to the coils.
Eventually, your RDA will no longer give you quite the same experience that it did when your first built the coil. You may need to remove the wicks, “dry burn” the coils to clear out the gunk and thread new wicks through — or you may need to build entirely new coils.
Pros of Rebuildable Atomizers
 A rebuildable atomizer gives you the most vapor per puff currently possible with an e-cigarette. That’s because an RDA has a very large deck, which enables you to build large coils — and a coil with more surface area can produce more vapor. Also, once you’ve purchased the RDA and a few required accessories, the cost of ownership is extremely low. People who use sub-ohm tanks often spend around $2.00 to replace each atomizer coil. With an RDA, the cost of a complete coil rebuild is just a few cents — all that you really need are a few inches of wire and some cotton.
Cons of Rebuildable Atomizers
Building new coils for an RDA is a lot of work. Even if you get to the point where you can wrap two coils, add wicks and test resistance in 20 minutes, that’s still about 19 more minutes than you’d need to change a coil in a sub-ohm tank. Also, with an RDA there is some potential for danger — especially if you’re using a mechanical mod, which doesn’t have the ability to tell you when you’ve done something incorrectly. If you make a mistake building a coil, you could end up with a short — or a coil that’s too low-resistance for your e-cigarette to handle. In either case, an RDA can potentially become dangerous.
How to Buy a Rebuildable Atomizer
When shopping for an RDA, the first thing you’ll want to consider is the quality of the workmanship. The parts should fit together smoothly. The screws that attach the coils to the posts should feel solid. Remember, if you build a new coil every day or two, the screws and posts are going to take a lot of abuse. Make sure they can stand up to it.

You’ll also want to examine the build deck. RDA coils are very small, so you’ll need to have sufficient room to manipulate the coils and get them in position. The RDA should also give the coils plenty of clearance so there’s little risk of them touching other metal objects within the RDA and causing shorts.
Most RDAs have either two or three posts. You’ll need to choose the RDA with an appropriate layout for the coils that you want to build. If you aren’t sure, our writers like the “Velocity” style of build deck. A Velocity build deck has two posts with two holes each. When you wrap a coil with both leads facing the same direction, you’ll find the one lead is higher than the other when you hold the coil horizontally. This works well with the Velocity deck. One lead goes in the higher hole, and the other lead goes in the lower hole. On the other side of the build deck, you’ll do the opposite. With the Velocity deck, you don’t have to play around with the leads to make the two coils in the RDA symmetrical — and you want the two coils to be symmetrical so they fire simultaneously.
Rebuildable Tank Atomizer (RTA)
The Best RTAs
- Sigelei Moonshot ($41.95)
- Two-post build deck, 2 ml e-liquid capacity. Unscrew the top cap to fill. Made from stainless steel and food safe plastic. Works at up to 200 watts.
- iJOY Tornado Nano ($30.90)
- Velocity build deck, 4 ml e-liquid capacity. Has pre-built coils available in packs of five — or you can build your own. Pre-built coils are much larger and generate far more vapor than typical sub-ohm tank coils. They’re easy to dry burn and re-wick. Unscrew the top cap to fill. Finicky threading but excellent vapor production.
- Wismec Theorem ($26.95)
- Three-post build deck with “T” center post. Juice well below the build deck rather than above. Although having the build deck above the juice well improves airflow and vapor production, it can be difficult to get the wick exactly right.
 How Rebuildable Tank Atomizers Work
A rebuildable tank atomizer gives you the rebuildable deck that you’d expect to find on an RDA and the e-liquid storage of a tank. In theory, an RTA gives you the best of both worlds. Not only can you build the cloud chasing coil of your dreams, but with the tank you can actually go a while without refilling instead of dripping every two or three puffs.
An RTA can have two basic designs. Depending upon the design, the build deck will either be above or below the tank portion of the RTA. If the build deck is below the tank, then the RTA will look much like a sub-ohm tank from the side — only with a much larger atomizer. It’ll work much the same, too — the atomizer will be enclosed with a chimney leading up toward the mouthpiece. E-liquid enters the atomizer through holes, and a wick closes the holes partially so the e-liquid can’t flood the atomizer.
If the build deck is above the tank, there’s no need to enclose the atomizer. In this configuration, the build deck will have at least one hole leading from the deck to the tank below. You’ll run a wick from the atomizer coil to the bottom of the tank, and the wick will draw e-liquid to the coil via capillary action. Having the build deck above the tank means that the coil will receive more air when you puff. It also means that you can access the coil for adjustments without emptying the e-liquid in the tank. However, it also means that e-liquid will have to fight gravity to get to the coil. You’ll need to wick the coil carefully to avoid dry hits.
 Pros of Rebuildable Tank Atomizers
Rebuildable atomizers are fun, but one can easily lose patience with the ritual of dripping, puffing and hoping that you don’t get a dry hit or flood the atomizer. With an RTA, you get the ability to vape for a while between refills — and you can clearly see how much e-liquid you have left. Though the build deck of an RTA typically isn’t as large as an RDA build deck, it’s often pretty close. If you configure an RTA correctly, you can expect much better vapor production than you’d get from a sub-ohm tank — and much more vaping time between refills than you’d get from an RDA.
Cons of Rebuildable Tank Atomizers
RTAs can be very, very finicky. Do you own a sub-ohm tank? Do occasional leaks frustrate you? Well, the problem is far worse with an RTA. Imagine the tedium of building an atomizer coil and trying to get the wick just right. Now, suppose you build an RTA coil and find that you made a mistake when wicking the coil. There’s a portion of the coil that doesn’t touch the wick, so the coil has a hot spot. You’re burning your throat with every puff. The coil is unusable until you fix the problem. What will you do? Will you try to pour the tank’s contents into a bottle? Will you turn the tank upside down to access the coil and risk spilling e-liquid everywhere?
How to Buy a Rebuildable Tank Atomizer

The top complaint about rebuildable tank atomizers is that they leak. They leak because you have to wick them just so, or they don’t work properly. They leak because you risk dumping the contents of the tank to make a coil adjustment. They also leak because of finicky threading. So, the first thing that you should look at when buying an RTA is the quality of the machining. A typical RTA has as many as three threaded joints — one at the bottom, one to connect the rebuildable deck to the chimney and one to remove the mouthpiece for filling the tank from the top. You could easily open the bottom of a poorly machined RTA and dump its contents when what you actually meant to do was remove the top cap for refilling.
The next most common complaint about RTA is that they fail to wick properly, leading to dry hits. You’ll need to have some patience when building RTA coils. Most of the build decks have wick holes. You’ll need to use enough cotton to cover the wick holes and prevent e-liquid from flowing in, flooding the atomizer and eventually leaking on your hand. However, you shouldn’t use so much cotton that e-liquid can’t flow quickly to the coils. Every RTA will be a new learning experience for you. Buy one that looks like it won’t cause you to lose patience.
Types of Wires for Sub-Ohm Vaping
The wire is one of the most crucial components of a good sub-ohm vaping setup. The wire largely determines the vapor production of the coil. In part, it also determines the flavor of the vapor. Some types of wires support temperature control vaping with the correct type of mod, while standard Kanthal does not.
The five most popular wires for sub-ohm vaping are Kanthal, nichrome, nickel, titanium and stainless steel. That’s only the beginning, though. Will you choose a round wire or a flat one? Will you use a single wire or multiple wires braided or twisted together?
If your mod supports every type of coil, your best bet is probably to try them all and see what you think. Almost everyone starts with Kanthal, though. Kanthal is easy to work with, and its relatively high resistance means that you won’t be likely to build a coil that’ll over-stress your mod and battery. To learn more, read our list of the different types of RBA wires for sub-ohm vaping below.
Kanthal A-1
 Kanthal A-1 is an alloy of iron, chromium and aluminum. It is the most popular resistance wire worldwide for e-cigarettes. It is common as well in household appliances such as toasters. Kanthal wire has a very high melting point, resists oxidation and lasts a very long time before failing. If you’ve ever had an e-cigarette atomizer stop working properly, it is most likely because the wick was ruined — not because the coil stopped firing. If Kanthal has any downside as a resistance wire for sub-ohm vaping, it is that Kanthal has a slight delay before heating up compared to other types of RBA wires. Because of Kanthal’s many strengths, though, we recommend using it for your first coil build.
Pros of Kanthal coils: Kanthal wire is extremely durable. You can often dry burn and re-wick a plain Kanthal coil many times before you’ll need to replace the wire. Plain Kanthal coils are also the easiest to make. Once you gain experience, you can build a plain Kanthal RBA coil from scratch in only a couple of minutes. Because plain Kanthal coils don’t have tiny nooks where unvaporized e-liquid can hide, they don’t develop gunk as quickly as some other coils.
Cons of Kanthal coils: A single strand of Kanthal wire doesn’t have a lot of surface area. As a result, plain Kanthal often doesn’t generate as much vapor per puff as twisted or braided Kanthal wire.
Clapton Wire
 Named for the famous musician, Clapton wire is very much like a guitar string in that it consists of a smaller diameter wire tightly wrapped around a larger diameter wire. The wrapped wire has the same resistance as a single wire with the same gauge and length, but it has far greater surface area. Although it’s possible to make Clapton wire using different types of wire for the core and outer wraps, most Clapton configurations use Kanthal wire alone.
Fused Clapton wire is similar to standard Clapton wire. However, it has two core wires rather than one, giving the final Clapton wire a slightly flat appearance. Some people feel that fused Clapton wire reduces spitting and improves flavor further compared to standard Clapton wire.
Pros of Clapton coils: More surface area almost always equates to more vapor and superior flavor. In fact, many people believe that Clapton wire produces the best possible flavor currently available in vaping.
Cons of Clapton coils: Because Clapton wire is much thicker than plain Kanthal wire, it can be a little difficult to work with. Second, some people experience “spitting” — hot e-liquid on the tongue — when using Clapton wire. Spitting occurs because the core becomes hot before the outer layer does. E-liquid trapped between the inner and outer layers can sometimes vaporize violently, sending droplets outward. The layered design Clapton wire can also contribute to the fast buildup of coil gunk. Lastly, the high mass of a Clapton wire means that you’ll need a powerful mod to heat it quickly and evenly.
Flat Kanthal
 If you like Kanthal wire and want to play with a coil build that gives you increased surface area — but Clapton coils aren’t doing it for you — give flat Kanthal wire a try instead. As you might suspect from the name, flat Kanthal wire has an appearance similar to that of ribbon.
Pros of flat Kanthal coils: When you wrap a coil with flat Kanthal wire, more of the coil’s surface area will draw e-liquid from the wick — and you’ll get more vapor. In addition, many people find it easy to wrap coils with flat Kanthal wire because the ribbon shape makes turning the wire around a drill bit or coil jig easier.
Cons of flat Kanthal coils: Flat Kanthal wire is weak. The thin ribbon twists and crimps easily, creating weak spots that can shorten the life of a coil. An additional downside of flat Kanthal wire is that many RBA posts aren’t designed for it. It can be difficult to attach a flat wire to a post designed for a round wire, and you could create a short if you attach it incorrectly.
Twisted and Braided Kanthal
 You can find just about as many methods for twisting Kanthal and other wires as there are vape enthusiasts on YouTube. Some of the unique twists that we’ve discovered include hive coils, vertebraid coils, staple coils, caterpillar track coils, alien coils, kumihimo coils, Area 51 coils, zipper coils, helix coils, tiger coils, and many more.
Pros of twisted and braided Kanthal coils: As with Clapton coils, the point of braiding or twisting a coil is to create additional surface area for vaporizing while simultaneously creating channels for e-liquid that enhance the effectiveness of the wick. It’s all about enhancing flavor and vapor production — but elaborate RBA coils have also become something of an art form. People love to share their designs and compete with one another.
Cons of twisted and braided Kanthal coils: Twisted and braided Kanthal coils are typically very low-resistance and have a great deal of surface area. As a result, they require mods capable of handling high amperage loads safely. In addition, twisted and braided coils may pop and spray hot e-liquid on the tongue in certain circumstances. Because twisted and braided coils have many “nooks and crannies,” they may develop gunk more quickly than single-strand Kanthal coils.
Nichrome
 Nichrome wire is an alloy of nickel and chromium. Although it is less popular overall than Kanthal wire for atomizer coil builds, it has its own strengths and weakness that make it worth your consideration. When buying nichrome wire for your RBA, consider selecting an alloy containing 80 percent nickel. Some e-cigarette owners have reported that a lower nickel content can impart a metallic taste to e-cigarette vapor.
Pros of nichrome coils: If the wire length and gauge are equal, a nichrome coil build will have a lower resistance than a Kanthal coil. If you have limited building space in your tank or atomizer and a mod that can support the lower resistance, switching from Kanthal to nichrome will likely improve the vapor production of your vaping setup. If you have plenty of building space, you may be better off trying Clapton wire or braided/twisted Kanthal instead — although some people manipulate nichrome by braiding or twisting it as well.
Cons of nichrome coils: Nichrome doesn’t tolerate extended use quite as well as Kanthal. As a result, it’s possible that nichrome coils won’t quite last as long. Also, because nichrome wires heat up much more quickly than Kanthal wires, you may burn your wicks more easily when using nichrome. Lastly, nichrome doesn’t hold its shape as easily as Kanthal does when you wrap it. You may find nichrome a bit more difficult to work with.
Pure Nickel (Ni200)
 Pure nickel wire has almost no resistance — about 0.6 ohms per foot of wire. As a result, it can’t be used safely as the only wire in a standard RBA coil build. However, it can be used to insulate the leads of a Kanthal or Nichrome coil. The idea is that, if you attach a nickel wire to a standard coil, the mod will deliver most of its electricity to the coil itself — rather than the leads. Thus, the coil should heat faster. More commonly, Ni200 is used to build coils for mods that support temperature control operation. Temperature control operation adds an extra measure of safety to sub-ohm vaping by reducing the likelihood of singed wicks and “dry hits.” Most temperature control devices support both Ni200 and titanium coils.
Pros of Ni200 coils: Every mod that supports temperature control operation has a mode for nickel coils. Nickel has a high temperature coefficient of resistance. So, a mod can determine the current temperature of a nickel coil accurately if it knows the difference between the current resistance of the coil and the starting resistance. If accurate temperature detection is your priority, nickel is the metal that you want to choose.
Cons of Ni200 coils: Compared to Kanthal and titanium, some people think that nickel changes the flavor of the vapor that an atomizer produces in a distinct way. Others disagree; taste is a subjective thing. Nickel coils may be a bit more difficult to wrap than Kanthal or titanium coils because the metal is so soft. Until you’ve tempered it by heating it, nickel also tends to spring back when you wrap it. When wrapping a nickel coil, you’ll need to exercise extra care to make sure the coil wraps don’t touch. Otherwise, you’ll end up with hot spots that shorten the life of the coil. Because the wraps in a nickel coil shouldn’t touch, building a nickel coil on a small atomizer deck can be difficult.
Titanium
 Although the earliest temperature control mods supported nickel coils only, most now have support for titanium coils as well. Titanium has a higher resistance than nickel, so you’ll need more wraps to complete a titanium coil with the same resistance as a nickel coil. The benefit is that titanium allows you to create a coil with more surface area than a nickel coil — if you have sufficient space — for a given resistance. Also, titanium doesn’t resist coiling in the way that annealed nickel does prior to tempering.
Pros of titanium coils: In addition to being a good metal for building an RBA on a large atomizer deck, titanium is less likely than nickel to have hot spots when the turns of the coil touch one another. Titanium is also stronger than nickel and easier to wrap coils with. Some people prefer the taste of titanium, but others say the same about nickel — so it mainly comes down to personal preference.
Cons of titanium coils: Opinions vary as to how safe titanium is for vaping. Under normal conditions, titanium remains very inert. However, at around 600 degrees Celsius, titanium dioxide can form. Inhalation of titanium dioxide is known to cause cancer in rats. At just over 600 degrees, titanium can burn. For maximum safety, don’t dry burn titanium coils. If you see a white powdery substance on a titanium coil, discard the coil.
Stainless Steel 316L
 Surgical grade stainless steel is fast becoming one of the most popular coil building materials for sub-ohm vaping today. The arguments in favor of using stainless steel for sub-ohm coils are many. Stainless steel has very low resistance, so it heats up very quickly. If you’re using a modern temperature control mod, you can use a stainless steel coil in wattage mode or in temperature control mode. Stainless steel is very malleable, so it’s easy to build coils out of stainless steel wire. People believe that stainless steel produces very pure flavor.
Pros of stainless steel coils: Almost everything. Like Kanthal, stainless steel is thought to have very few drawbacks. It heats fast, delivers pure flavor and works on almost any modern device. You can stamp it into interesting shapes, which has given rise to very popular “notch” coils like the one pictured here. What’s not to like?
Cons of stainless steel coils: Stainless steel has an even lower temperature coefficient than titanium. Even if you have a temperature control mod that’s supposed to support stainless steel, there is some question as to how accurately the low-end temperature control mods can detect the temperature of a stainless steel coil. Some say it’s more like temperature “guessing.” We’re quite confident in the temperature detection accuracy of the devices that we recommend in this article, though. An important detail to remember about stainless steel coils is that although they do work in wattage mode, the resistance of stainless steel is very low compared to Kanthal. Make sure that your device can handle the load.
Types of Wicks for Sub-Ohm Vaping
In any sub-ohm vaping setup, the wick is just as crucial to the overall experience as the coil. Just like the coil material, the wick can slightly alter the flavor of an e-liquid. What’s more important, though, is the wick’s ability to quickly bring e-liquid from the atomizer’s well or tank to the coil. If the coil doesn’t remain saturated with e-liquid long enough for you to complete a long puff, you’ll taste foul flavors and feel a harsh burning sensation in the back of the throat.
There’s more to sub-ohm vaping than simply selecting a wick that delivers e-liquid to the coil reliably, though. Do you want a wick that resists burning? How about a wick that doesn’t become dry even during chain vaping? Are you looking for a competition wick that’ll help you get the biggest clouds possible, or do you want a wick that delivers accurate flavor? Read our comparison of vaping wicks to learn more.
Vaping Wicks: Comparison Chart
| Cotton | Rayon | Silica | Stainless Steel | Hemp | Ceramic | Wickless | |
| Easy to use? | Yes | Yes | No | No | No | No | No |
| Durable? | No | No | Yes | Yes | No | Yes | Yes |
| Best flavor? | Yes | No | No | Yes | No | Yes | Yes |
| Dry burn? | No | No | Yes | Yes | No | Yes | Yes |
| Fast wicking? | Yes | Yes | No | Yes | No | No | N/A |
| Possible danger? | ? | ? | ? | Yes | ? | ? | Yes |
Vaping Wicks: Details
Japanese Organic Cotton (Koh Gen Doh)
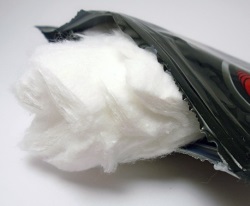
 Japanese organic cotton is the most popular wick material for rebuildable atomizers because of its extremely low cost — you can wick upwards of 80 coils for under $4.00 — and purity of flavor. Most people agree that an organic cotton wick results in the most accurate flavor reproduction possible. Cotton also has the ability to hold a great deal of e-liquid without leaking or dripping. If you’re building your first coil and aren’t sure which wick material to use, you should use Japanese organic cotton. Using it is as simple as tearing a strip from the square, rolling the end between your fingers and threading it through the coil.
The cosmetics company Koh Gen Do makes the majority of the organic cotton used for sub-ohm vaping. When you buy organic Japanese cotton for your RBA, you’re actually buying repackaged Koh Gen Do sheets intended for toning the skin or removing makeup. If you want to go straight to the source, buy from Amazon and save a bunch of money. Look out for fakes, though.
Pros of cotton wicks: Cotton is versatile and reliable. It works very well with any e-liquid. Most people agree that, out of all the wick materials, cotton is the one that has the least impact on an e-liquid’s flavor. Although there’s little scientific basis for this statement, most people seem to agree that cotton is an extremely safe wick material as long as you don’t allow it to burn.
Cons of cotton wicks: Unfortunately, cotton burns very easily. If a cotton wick is dry, it’ll burn almost immediately at any normal vaping temperature. You’ll inhale the byproduct of the burning wick, and it’ll never taste right again. Thankfully, replacing it is as simple as pulling the wick out of the coil and dry firing the coil to burn away any residue.
Cotton Bacon
 Cotton Bacon is a trademarked term for a specific brand of cotton wick. Cotton Bacon is grown in the United States and claimed to be 100 percent cotton and free of pesticides and impurities. The cotton chosen for Cotton Bacon has very long fibers, which the developer claims improves wicking action. Cotton Bacon is made from medical grade cotton.
Pros of Cotton Bacon: Cotton Bacon’s maker claims that their product may be safer to use than Japanese organic cotton since Japanese cotton is designed for the cosmetics industry and may contain trace lotions or organic pesticides. Their claim is difficult to verify or refute. However, true medical grade cotton should be very, very clean. Some people claim that Japanese cotton tastes “off” until it “breaks in,” and that Cotton Bacon has no such drawback.
The long fibers of Cotton Bacon are an additional benefit. If a wick does a good job of bringing e-liquid from the well of an atomizer to the coil, you should end up with less residue and gunk, and your coils should last longer. In theory, longer fibers will also allow you to take longer and more frequent puffs without dry hits.
Cons of Cotton Bacon: Same as Japanese cotton. Some people claim that Cotton Bacon doesn’t burn as easily as standard Japanese cotton, but that may be because the long fibers enhance wicking action, leading to less dryness in the coil. Some people prefer the flavor of Japanese cotton wicks, but taste is subjective.
Rayon/Cellulose
 Rayon is a fiber made from chemically treated wood pulp. To make rayon, wood pulp is treated with a solvent until it dissolves. The resulting compound is then spun into fibers. When people mention using rayon wicks for sub-ohm vaping, they’re mainly talking about a beauty product called Cellucotton. Since Cellucotton comes out of the box already shaped ideally for wicking, it’s very convenient to cut a length from the strand and thread it through a coil. When buying the Cellucotton brand, though, note that a cotton version is also available. The cotton version is most likely bleached and not organic — so check the box before buying.
Pros of rayon wicks: Some believe that the capillary action of rayon is far superior to that of cotton. While cotton wicks work primarily by absorption, people claim that rayon does a far better job of moving e-liquid rapidly from point to point. A few people actually feel that rayon wicks e-liquid too quickly, which isn’t a claim made often about any wick for sub-ohm vaping.
Cons of rayon wicks: Opinions vary as to how safe rayon wicks are for sub-ohm vaping. On one hand, vaping with rayon is basically like vaping with wood, since that’s what rayon comes from. On the other hand, cellulose doesn’t become rayon without a lot of chemical assistance. Some say that rayon imparts an “off” taste when used for vaping. Others say that only happens when you use too much material to make your wick. Also, rayon burns at around 420 degrees Celsius. It’s less likely to burn than cotton, but can still potentially ignite when dry.
Ekowool and Silica
 Silica and Ekowool — a trademarked product made from silica — are popular wicks for sub-ohm vaping because of their ability to resist heat. While cotton will ignite at around 400° C, silica is heat-resistant up to about 1,000° C. Some people even clean their silica wicks by dry firing them to burn away the residual gunk left by sweeteners and NET e-liquids. Since most atomizer coils never reach 1,000° C, the wick doesn’t burn even when dry.
Pros of silica wicks: Silica doesn’t burn at any vaping temperature — even if you dry fire it. If you find yourself constantly replacing your cotton wicks because they get gunky and burned, silica may be exactly what you’re looking for. Things aren’t tasting right because of coil gunk? No problem — just burn the gunk off. No need to remove the wick. Some people believe that silica wicks e-liquid more effectively than cotton, but others disagree. The effectiveness may depend upon wick positioning.
Cons of silica wicks: Silica wick has two drawbacks. First, silica is a major component of fiberglass, and as you are likely aware, silica particles are not safe to inhale. However, there’s no proof that people who use silica wicks are actually inhaling any of the silica. Also, it isn’t certain that any wick type is more inherently “safe” than the others. Secondly, many people find that silica imparts an “off” taste to e-liquids. Some simply find the flavor “muted,” while others have gone so far as to say that silica imparts an “old socks” flavor. You may be able to minimize any “off” flavors by torching silica wick before using it.
Many people suggest torching the ends of a silica wick as well, because silica wick frays easily. Lastly, silica wick is a little difficult to work with. You can’t just roll it between your fingers and push it through a coil as you can with cotton. Instead, you’ll need to wrap the coil around the wick. Some people find that difficult to get used to.
Stainless Steel
 While silica wicks may be long-lasting, they still can’t compare to the durability of stainless steel wicks. Stainless steel won’t burn or melt at any temperature that your atomizer coil can realistically reach when sub-ohm vaping. In fact, stainless steel has a melting point more than 30 percent higher than the temperature at which silica burns. If the wick starts to gunk up, it’s no problem — torch it until all of the residue burns off.
Pros of stainless steel wicks: Stainless steel wicks are very effective — so effective that they have absolutely no problem working against gravity. Some people say that stainless steel produces some of the purest flavor you’ll ever get when vaping. Others believe that it imparts a metal taste, though, so your mileage may vary. The main benefit of stainless steel is that, although the wick takes a vary long time to set up, it also lasts a very long time. You can dry burn it whenever you like, torch away the residue — it doesn’t matter. You’ll probably be able to use the same wick for months.
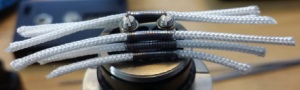
Cons of stainless steel wicks: Stainless steel wicks are mostly popular for use in Genesis-style rebuildable tank atomizers such as the one pictured to the right. The mesh makes contact with the coil and dips into the tank below, drawing e-liquid up via capillary action. Stainless steel wicks are far less common in the rebuildable atomizers that most people use today, though. Stainless steel wicks are exceptionally difficult to work with. Because steel is conductive, a mistake can result in a short circuit. To build a stainless steel wick, you’ll either need to torch the mesh to build up a layer of oxidation or insulate it with silica or another material. Also, because stainless steel mesh isn’t fluffy, you’ll need to build the wick differently than you would with cotton or another material. If the wick doesn’t touch every part of the coil, you’ll end up with hot spots.
Hemp
 Hemp is an alternative vaping wick that has a very niche audience. Hemp fibers are very long and quite durable. They also aren’t quite as prone to burning as cotton — so they often last longer. On the other hand, hemp isn’t quite as soft, fluffy and easy to work with as cotton — and you can’t use just any hemp wick. You can’t use anything coated in wax, and you need to look for hemp fiber that’s de-gummed and and stripped of as many contaminants as possible. Also, most people agree that a hemp wick alters the flavor of an e-liquid.
Pros of hemp wicks: Like cotton, a hemp wick is a natural fiber in its natural state. That appeals to people who want a more durable wick that doesn’t undergo chemical processing. Hemp wicks may last longer than cotton wicks in some atomizers. Because hemp fibers are very long, hemp is a very effective material for wicks.
Cons of hemp wicks: Many people agree that hemp wicks tend a distinct “woody” flavor to vapor. A few have resorted to boiling their hemp wicks in an effort to make the flavor more neutral. Some people have also reported that the uniformity of the hemp fibers is sometimes lacking. With poorer quality hemp wicks, you may have to deal with small “woody” bits that have the potential to ignite.
Bamboo
In vaping, the term “bamboo wick” is a bit of a misnomer. After all, when you buy a bamboo wick, you’re not buying a wick made from actual bamboo fibers. You’re buying a wick made from cellulose that’s chemically stripped from bamboo. In other words, you’re buying rayon made from bamboo. It’s a sustainable product, though. Bamboo wicks aren’t particularly popular for vaping, and you do need to scrutinize the source. Many companies make bamboo threads and yarns for the textile industry. You can’t buy just anything off the shelf, because some bamboo fibers may contain dyes. We don’t currently know of a recommended source for bamboo vaping wicks.
Pros of bamboo wicks: Same as rayon wicks.
Cons of bamboo wicks: Same as rayon wicks.
Ceramic
 Ceramic wicks are made from ceramic fibers that are braided together. After braiding the fibers, the maker treats them in a kiln to bind them together permanently. Ceramic vaping wicks are popular enough that some companies actually use them instead of cotton wicks when making coils for sub-ohm vaping tanks. Some people consider ceramic the “flavor chaser’s wick” — you may sacrifice some vapor production, but you’ll get a very pure flavor.
You can also find tanks with coils and/or wicks made from sintered ceramic. That’s not the same thing as a ceramic fiber wick. Rather, sintered ceramic is ceramic powder that’s mixed with water to make a slurry, poured into a mold and heated until solid. Although the ceramic is solid, though, it remains porous; e-liquid can still seep through.
Pros of ceramic wicks: Ceramic wicks have almost all of the qualities that you would want for sub-ohm vaping. They deliver very pure flavor. Because they’re ceramic, they resist heat. Ceramic wicks also last much longer than most other wick types.
Cons of ceramic wicks: There are some concerns about the possible dangers of vaping with ceramic wicks. Some people wonder about the similarity between ceramic and fiberglass. There are some questions about whether it might be possible to inhale small ceramic fibers when vaping. Some ceramic fibers are very brittle and crumble easily between two fingers. There is really no evidence, though, about the safety — or lack thereof — of any wick type. One thing that many people do agree upon, though, is that ceramic wicks may need a bit more time to saturate than other wick types. Although ceramic wicks produce very pure flavor, they don’t have the greatest vapor production and require a bit of time to re-sautrate between puffs.
Wickless Coil
 Did you know that you can actually build an atomizer coil with no wick at all? When building, you’ll need to exercise special care to make sure that your coil doesn’t touch other metal objects. To use a wickless coil, you’ll drip e-liquid directly on the coil and puff. You’ll have to exercise care in taking shorter puffs, and you’ll have to add more e-liquid between each puff. It’s hard to imagine a purer flavor, though.
Pros of wickless coils: Wickless coils are perfect for creating new e-liquids or testing multiple flavors in quick succession. There’s little carryover from one flavor to the next — and if there is, you can just dry burn the coil.
Cons of wickless coils: Wickless coils will glow and release horrible flavors into your mouth the instant they’re dry — and without a wick, there won’t be a warning. They may work well for testing flavors. For everyday vaping, though, wickless coils have no use unless you’re willing to take short puffs and drip constantly.
Sub-Ohm Vaping With an RBA: Building Your First Coil
Important Tips
- When buying resistance wire for sub-ohm vaping, note that a larger number indicates a thinner wire and therefore a higher resistance. This is because thicker wires have more volume, allowing more current to flow.
- A coil jig includes several posts that allow you to adjust the diameter of your coil turns. If the number of turns per coil is the same, a larger post will result in a higher-resistance coil because you’re using more total wire. If you use a smaller post and increase the number of turns, you can increase the amount of coil that touches the wick while increasing the resistance less.
- We strongly recommend using ceramic tweezers when adjusting your coils. The ceramic will protect your hands and won’t conduct electricity.
- Always check the resistance of a new atomizer build before using it.
- Always know the capabilities of your mod and battery before using a rebuildable atomizer.
- Begin by screwing the RBA base into your build platform. Cut about eight inches of wire from the spool and divide the wire into two halves. Cut a length of cotton from a pad. Assemble the coil jig according to the included instructions. Loosen the three atomizer posts with a screwdriver.
- Thread a length of wire through the eye of the coiler, wrapping it tightly around the post to begin the first turn. Leave the end of the wire facing up.
- Place the other half of the coiler over the post so that the wire rests under the small head of the coiler.
- Using the head to guide the wire around the post, turn the coiler several times to make a coil with about 6-8 wraps.
- Remove the finished coil from the coiler and repeat the process with the second wire. In the future, you can adjust the resistance and surface area of your coils by changing the size of the coil jig post or adjusting the number of turns. Remember, though, that an atomizer build should use two identical coils. Otherwise, they won’t heat evenly.
- Thread the ends of the coils through the holes of the RBA. The coils should be installed on opposite sides of the RBA, with one end of each coil sharing the middle post if you’re using a three-post RBA.
- Adjust the coils before tightening the three RBA posts. Use this time to make sure that excess wire is eliminated and that the coils are as identical in length as possible. The coils should not touch any metal part of the RBA except the posts. Trim the excess leads with scissors or wire cutters.
- Use the build platform to check the resistance of the atomizer. If you’ve met your target resistance and the tester doesn’t show a short, you are ready to continue.
- Remove the atomizer from the build platform and connect it to your mod. Fire the mod until the atomizer coils glow. “Dry firing” the atomizer causes it to form a protective layer of oxidation. This process also helps you make sure that the coils don’t have hot spots and that both sides fire simultaneously. If one coil takes longer to glow, the lengths of the wires are uneven. Correct this problem by trimming a small amount of wire from the coil that heats up more slowly. Remember, the coils are hot.
- Adjust the coils with the ceramic tweezers, pushing gently to compress the coils together.
- Take a small amount of cotton and roll one side between your finger and thumb. Thread the cotton through an atomizer coil, fray both ends and use the tweezers to stuff the excess cotton under the coil. As you use the atomizer, the cotton will draw e-liquid from the bottom of the atomizer — also known as the “well” — to the coil. Repeat this process with the second coil. Your first RBA build is complete.
- Saturate the coils and wicks with plenty of e-liquid before using the atomizer.
Jason Artman is the founder of eCigOne.com, where he helps vape and alternative nicotine brands grow through SEO and digital marketing. Jason's work has been featured in major media and cited in peer-reviewed research. He has helped to drive growth for well-known vape brands such as JUUL, NJOY, VaporFi, South Beach Smoke and V2 Cigs.


Great guide for beginners of the rebuilding rba RTA systems explained a few things I didn’t know
Hi!
I have a question, I have Wismec RX2/3, and it uses 2 (or 3) LG HG2 with a max discharge of 20A, does that mean that (as I use 2 of them) the max discharge sums up to 40 Amps? Or 60 while using 3 batteries?
Hi Alfredo,
In a two-battery mod with two 20A batteries, the max discharge would be 20A. How do you like your device?
what a great page thnaks for all the efforts!!
We’re really glad that you got something out of the guide, Roger. As you can imagine, putting it together was a lot of work!
Whoaaaaa
Great article man, such detail and up to date! Thanks a lot!
I’m not new & this was all great information. Thanks for your efforts! Keep the vape community great
So, in your opinion, which do you believe is the “safest” choice for wires/wick material? Kanthal & Japanese cotton? It’s a tough call, you’ve got tons of info. Super helpful!!! 🙂
Hi Nicole,
We don’t believe that it is possible to make a determination about the safest wicks and wires without a great deal of research. There would be a lot of variables to consider. How do different wick and wire materials interact with different e-liquid flavors? How does the level of safety change if the user allows coil gunk to build up? What if the user burns the wick because it’s gone dry? The best that you can do right now is make your own decision based on the information that you can find.
I suppose the cotton bacon would be on par w Japanese cotton. Other than the assumption there’s a possibility of Japanese cotton having traces of lotions, etc vs the medical grade cotton w the longer cotton strands…they’re the same, correct?
Some have alleged that the Japanese cotton could have trace lotions because it’s intended for the cosmetics industry, but we’ve seen no proof of that. There is a definite difference in the fibers, though, if you compare Japanese organic cotton vs. Cotton Bacon vs. Native Wicks. The Japanese organic cotton fibers are not very long or fluffy. The Cotton Bacon fibers are very fluffy, and the Native Wicks fibers are very long. Ultimately, you’re going to have a great experience with any of them as long as you use the right amount of material. The wick should fit tightly inside the coil — but not so tight that inserting the wick is overly difficult.
I am new to vaping and I just purchased a kanger mini sub tank with the eleaf 100w battery back. What do you recommend the temp. and wattage should be? I am using the japenese cotton.
Hi Jenn,
For the Kanger Subtank, we’d suggest starting at 20 watts and working up slowly until you get the flavor and vapor volume that you want. You’ll probably find your sweet spot at around 25 watts. You can go a bit higher than that if you take short puffs. If you prefer long, deep puffs, be careful with the wattage because the cotton singes easily.
Thank you for providing great information. I am sharing it with my friends.
One question: I am using eleaf istick pico 75w. I tried vaping with different wattage from 30W-60W but I am getting very thin vapors and virtually no cloud. I am using original supplier coils with 0.5 resistance, even after changing the coil there is no difference.
I am using a 6.7A battery, do you think this could be the case? I did not know about the battery as I was an amateur. I have now ordered a 25A original LG battery. Do you think a low discharge rate of 6.7A could be impacting the vapor production?
Thank you
Stanley, the battery could potentially be the cause of the poor vapor production if the iStick Pico has the ability to detect over-current conditions. Operating your device at 60 watts would generate a current of 10.95 amps — far more than your battery can handle. In fact, for safety’s sake, we’d strongly recommend that you not use that device at all until you receive your new battery. If you don’t have another device to use, pick a battery up at a local vape shop. Everyone can use an extra battery, and using a low amperage battery for sub-ohm vaping really is potentially dangerous.
Handle the battery problem first. If by some chance your device can’t detect the over-current condition — and the battery actually is trying to output those 10.95 amps — you may still experience poor vapor production after upgrading your battery. If that is the case, try a different tank. We haven’t used any of the ELeaf tanks and can’t comment on their vapor production.
Glad you enjoyed the article, and we hope you find this advice helpful!
Hey, i was just wondering how many amps i would need to run 0.075ohms in my troll v2 rda on my 220w alien tc mod.
Alex,
To find the number of amps required to drive any load using Ohm’s Law, you need to know the wattage or voltage. We do not consider a load of 0.075 ohms safe at any wattage. It’s possible that you actually meant 0.75 ohms, but even then, the resistance of that build would be extremely low. We understand that many people build coils under 0.1 ohms, but we believe that’s an unnecessary risk.
hi
amazing guide!
I was just wondering if you could help me out with this one ….
ive got two fused alien Clapton coils reading 0.2 ohms in my rda , what is the recommended wattage I should be using on my wismec rx2/3 using Samsung 25r batteries
Great. Thank’s for a lot of info.